
Hey and welcome back to my tutorial on Windows 10 themes. That is welcome back as this is part 2 of the series. If you missed the last part, you can find part 1 here:
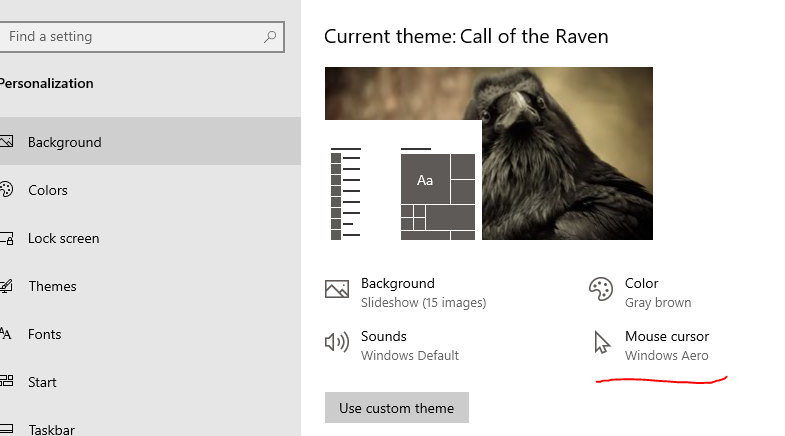
We left off on how to customize sounds in the last article, so in this article, we are going to start with mouse point options. So go ahead and open up the themes section of your settings and you should see the mouse point options as pictured below:
You will be prompted with a new window like below:

You will have multiple sections to this window much like the
sound customizations. You have at the top schemes. This is a drop list of all
the prebuilt schemes that windows have prebuilt. You can go through each scheme
and you will have multiple options for different mouse selections.
So if you go through the schemes, some will make your
default mouse point black and large, some of them will make your pointer white
and large. Try them out by selecting the scheme and selecting apply to see how
it looks.
If you would like to customize your mouse pointer, you can
go to the customize section as pictured below:

Here is where all the different states of the mouse pointer
are listed. Either loading or if you’re going to be clicking a link, what do
you want that to look like. Much like
when you changed your sounds when certain things happen, different sounds are
produced. Well, this will have different mouse pointers depending on what is
going on with the system.
So if you select one of the customization options and select
browse, you will be presented with a list of options you can choose from. As
pictured below:

You can also create
your custom mouse pointers much like sound files. They need to be in .ani or
.cur format.
You can find many free mouse icons online if you search for
mouse icons. Be sure to run your antivirus on these files to be sure they’re
safe.
The final option for the pointer option on this tab is the
enable pointer shadow as pictured below:

This simply adds a shadow to your mouse pointer. It’s just
another preference you can set for the mouse pointer itself.
Once you have everything set the way you like it. You can
click save as to save the scheme for your reference later much as you did with
the sound settings.
More settings can be changed in this window. But we are only
covering this section for themes as I will be making another article on all the
mouse settings. But this will be good enough to set up your theme itself at
this point.
Desktop Icon Settings
We can customize what the desktop icons look like also. If
you go back to the themes settings section, you will see on the right-hand
side, Desktop icon settings will be shown, as pictured below:

If you select it, you will be prompted with a new window
with the desktop icon settings. In the top half, you will have Desktop icons.
If you check the checkbox for say, Computer, it will add an icon to your
desktop for the computer. Try it and see what I’m talking about. Just check my
computer and click apply, you will see on the desktop that you now have my
computer icon on the desktop.
The lower settings, much like sounds and mouse pointers, you
can customize the way the icons themselves look. If you select the icon and
click Change Icon, it will then give you a bunch of preset icons you can change
to for each particular icon. As pictured below:

Once you have the Icons set the way you like them, you would
click apply and the icons will be changed to what you set them to. You can also
go online and find custom icons, once again be sure to scan with antivirus to
be sure they are safe.
If you make a bunch of changes and realize you don’t like
what you have set up. You can just click restore defaults, and it will reset
all the icons back to the default settings. Luckily because sometimes trying to
find the old ones can be a pain in the butt.
Finally, there is a checkbox that allows themes to change
desktop icons. We would want to keep this checked as we are setting up a theme.
That covers all the theme settings, so let's move on to
saving the theme for later use!
Once everything is set up the way you like it, you will want
to save this theme for future use and reusability. The save theme button is pictured
below:

Once everything is set up the way you like it, you will want
to save this theme for future use and reusability. The save theme button is pictured
below:

Once saved, in the change theme section you will then see
your saved theme in the list. Congratulation on setting up your first theme!
Now that theme will be available whenever you would like to
use it.
Windows Store Themes
The last theme setting we haven’t covered is the get more
themes in Microsoft store. As pictured below:
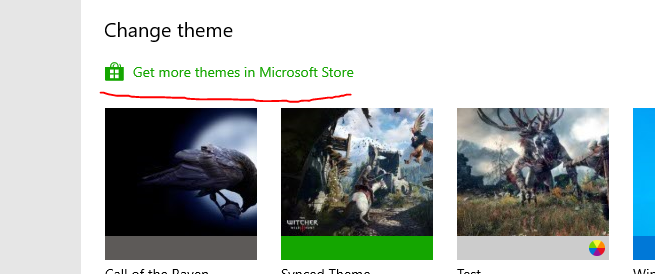
This option will bring you to the Windows Store where you
will find a bunch of pre-made themes that you can download and use. As Picture
Below:

Most themes are free
to download and uses. I like the look of the call of the Raven, so I'm going to
click that and you will be brought to a screen that gives you an overview of
the theme itself.
Once you decide you like it, you will want to select get on
the top of the overview page, as pictured below:

Once everything completes(the download and install), you
will be prompted with the apply option to set that theme as pictured below:

You will now notice in your saved themes, the theme you have
chosen is now an option to switch to. Pretty cool! Select it and enjoy your new
theme.
That about wraps up everything you would want to know about
themes, hopefully, you found this useful and enjoyed learning about it.
If you’re looking for any Technical Support, feel free to
take a look at my website:
Sinntechnologies.net
Otherwise, you have a great day!
Comments
Post a Comment